The PSOAS (Musculus psoas major, Latin for “large lumbar muscle”) is a deep-seated core muscle that connects your pelvis and lower back. It also plays an important role in promoting good posture.
It works with a coordinated group of muscles to stabilise the pelvis and midsection. However, overuse or injury can affect the performance of this muscle.
If you suffer from PSOAS syndrome, it can be difficult to identify the cause. Fortunately, a physiotherapist can help you. He or she will do special exercises to strengthen your PSOAS muscle. These exercises can also be done at home, which will speed up the recovery process.
Podcast
Before doing any exercise to relieve PSOAS, make sure your body is relaxed and comfortable. A little discomfort is normal, but it should only last a short time. You should also be prepared to experience strong feelings. These are completely normal and part of the process.
PSOAS and lower back pain
If you have lower back pain, you may be suffering from a tight PSOAS muscle. The contractions of the PSOAS muscle shorten the spine and put strain on the spinal muscles and vertebral joints. This strain causes lower back pain. It also contributes to other types of back pain, including sciatica and other lower back problems.
To prevent the development of this pain, take the time to stretch the PSOAS muscle and do activities that increase its flexibility. Using a tennis ball can help relax the muscle and improve flexibility. If you have lower back pain, be sure to see a doctor.
The PSOAS muscle plays a number of important roles in our daily lives. The PSOAS is responsible for walking, running and good posture
Is yoga good for the PSOAS?
If you have ever felt tension in the PSOAS muscles, yoga can help. Practising yoga asanas can help you release tension and improve your posture. But you should remember that yoga doesn’t just stretch the muscles.
It also helps to develop an awareness of the PSOAS, which can help you release tension when you are in a stressful situation.
To understand your PSOAS, you should start by paying close attention to it. It is the part of the body that is connected to the sympathetic nervous system, also known as the “fight or flight” response.
This reflex makes our bodies contract in the face of danger, which was very useful when our ancestors fought lions in the cave. Today, our daily lives no longer require such intense reactions, but our PSOAS still plays an important role in helping us release stress evenly throughout the body.
There are yoga poses which aim to strengthen the PSOAS.
By stretching, you can release the tension in the PSOAS. However, be careful not to do too much at once. Excessive tension in the PSOAS can make you feel tired and lacking in energy.
During the relaxation process, you may also experience strong emotions. But you need to accept these feelings as part of the process.
Which yoga poses train the PSOAS?
Of course there are more than these 5 yoga poses. But this should be enough for the beginning and once you have these poses under control, then move on. Train these poses with a yoga teacher at the beginning.
Lying Hand to Big Toe (Supta Shirangushthasana)
The yoga pose of lying hand to big toe is an excellent stretching exercise that works the legs and lower back. It also stretches the hip flexors and hamstrings. Yoga beginners can relieve lower back pain and strengthen the hamstrings with this pose. It is important to ground the lower back during this pose.
This yoga pose is also known as Supta Padangusthasana. It requires you to open your right leg to the side and place your left foot against the wall. Make sure that your left thigh remains rooted. This will help you find balance and feel emotionally stable.
You can try this pose in different variations. One variation is to lift one leg and bring your foot close to your gluteal muscles. This will stretch your hamstrings less and make the pose easier to perform. If you cannot lift your leg, try bending it instead of extending it.
Another variation of this pose is to lift your right foot towards the sky. To make this pose more accessible, you can bend the knee of your raised leg. You can also put a strap around your Achilles tendon to support the raised leg.
If you have a shoulder or hamstring injury, you should not attempt this pose. You should also avoid this pose if you do not have the flexibility in your hips.
Upward Facing Plank Pose (Purvottanasana)
The upward facing yoga plank pose is a great way to improve balance and burn fat in the chest, hips and lower abdomen. It also helps relieve the feeling of heaviness in the lower abdomen, especially during menstruation. It is a good all-round yoga pose and can be done by almost anyone.
This pose stretches the wrists, chest and arms. It also stimulates the front and back muscles and opens the heart chakra. The upward plank is a great evolution of the bow pose or bridge pose.
Next try downward facing dog or seated forward bend. This pose is challenging and requires concentration and inner strength.
This yoga pose helps to reduce the risk of muscle cramps and opens the body muscles. It also strengthens the chest, shoulders and glutes. This pose also helps to improve overall body strength and alignment. If you practice this pose regularly, you can avoid muscle imbalances that can lead to injury.
The upward Yoga Plank Pose is an excellent yoga pose for advanced practitioners. It improves strength and flexibility and is often combined with the seated forward bend and other strength-building full-body postures. It is important to remember that the upward Yoga Plank Pose is not difficult, but it does require a lot of core strength to master. If you practice it regularly, you will find it invigorating.
Lateral Plank (Vasisthasana)
Side plank is a variation of downward facing dog in which the weight of the body is shifted to one arm. Forearm versions of Side Plank Pose are also useful for reducing pressure on the wrists.
To begin Side Plank, be in Downward Looking Dog and place your palms apart. Then lift your standing leg and turn onto your outer foot. Place your top foot forward.
The side planks are challenging and require good strength and balance. If done improperly, you can injure yourself or roll forward and backward.
It is also good for developing core strength. Lateral planks help you improve your arm balance and your balance while standing. The benefits of side planks are many.
Besides strengthening your core, side planks also help tone your legs and arms. While working on good form, you should use your abdominal muscles to keep your upper hip over your lower hip. You can also rest your upper arm on your hip or by your side. Once you have found the right balance, you can try to stay in this pose for one minute.
It is a versatile pose with many variations. You can also teach it in multi-level classes by using a wooden board lying on its side. For beginners, you can also use a wall. You can even place it behind your head to give you more stability.
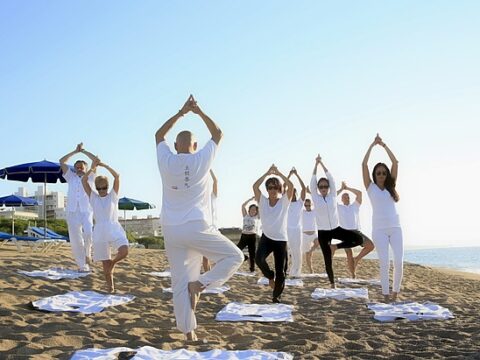
Tree Pose (Vrksasana)
The ancient balance pose known as Tree Pose is still popular in modern yoga. This ancient pose is one of the few standing poses in medieval hatha yoga, and it is still very attractive today. It is particularly beneficial because it allows you to strengthen your body and mind. You can practise this pose while standing balancing.
This pose can also be done with your eyes closed. It strengthens the ankle muscles and the small muscles in the feet. You can hold this pose for as long as you like. However, remember that incorrect form can lead to injury. For this reason, it is important to perform the tree pose correctly.
The first step in the tree pose is to bring your legs together. This helps you to get more balance and strength in your legs. The next step is to lift your right leg off the ground. Make sure you are as relaxed as possible. Lifting your leg for step four is harder than it looks, so it may take some time before you feel comfortable.
There are a number of variations of this pose. If you have weak knees or a weak lower back, you should practice against a wall first. In addition, if your hips are weak, you can try practising the pose by placing your foot on the inner calf muscle of your standing leg.
Boat Pose (Paripurna Navasana)
Boat pose, also known as Naukasana or Paripurna Navasana, is a seated yoga pose. It is one of the most common poses in modern yoga. Although it is often associated with stretching, it can also be helpful in building a strong centre.
To begin, sit on a mat with your legs straight. Raise your legs to a 45-degree angle. Then actively stretch your arms out in front. Make sure to keep your back flat and your knees straight. This posture strengthens the back and stretches the abdominal muscles. It also increases concentration and improves digestion. However, this posture can be dangerous if you suffer from back injuries or low blood pressure.
The boat pose involves a full-body alignment. This seated yoga pose develops core strength and coordination as well as flexibility. It also stretches the hamstrings and aids digestion. Therefore, it can be a useful pose for beginners.
Boat pose is a strengthening yoga pose that exercises the core and hamstrings. It also stimulates the solar plexus chakra. To get the most out of this pose, you should train a strong back and sufficient hamstring length. Then you can move on to more challenging variations.