Arthritis, a disease that affects the musculoskeletal system, is widespread. The most commonly affected joints are the hip and the knee. About 20 of people have arthritis. This is the gradual and sometimes progressive loss of the cartilage that covers the bones of a joint.
Contrary to popular belief, targeted exercises and strength training can be used to delay or prevent joint surgery for arthritis pain.
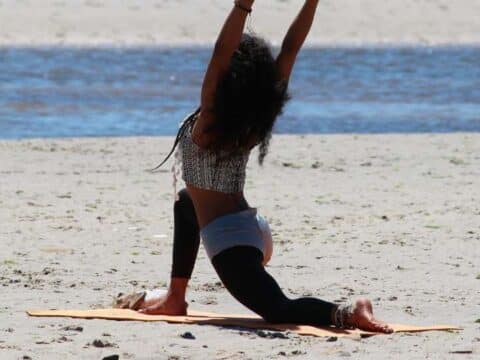
Both the Centers for Disease Control and Prevention and the Arthritis Foundation recommend an exercise programme for hip and joint arthritis that includes flexibility, strength, endurance and balance. All four components of yoga are effective in reducing arthritis pain and disability.
How yoga can relieve arthritis pain
For people suffering from knee and hip pain, it is important to focus on strengthening the muscles that surround the joints. These include the quadriceps and outer thighs. This will stabilise the joints and reduce pain.
Arthritis in the knee can lead to less weight being placed on the joint and less use being made of it. The muscles around your knee can become weaker from lack of use and strain. As the muscles become weaker, their mobility decreases, which can lead to more pain.
The following exercises will improve your knee and hip health.
Podcast
10 Ways to get rid of hip osteoarthritis and knee pain
Before using these yoga exercises, talk to your doctor.
WARRIOR I (VIRABHADRASANA)
Warrior I strengthens the muscles at the front of your thigh. It keeps the knee stable and the hip, knee, ankle and hip of the front leg mobile. The hip extensors in the back leg are strengthened by the Warrior I.
It controls the extent of hip extension and abduction. You can adjust the length of your stance to make this posture more flexible. If you feel that this stance is too painful for your knee, you can reduce the length of the stance.
EXTENDED LATERAL ANGLE POSE (UTTHITA PARSVAKONASANA)
Strengthening the hamstrings is key to improving muscle strength and reducing pain in people with hip osteoarthritis. In the extended side angle position, the front hip is brought into abduction and external rotation.
This allows for greater activation of the thigh muscles. Changing the centre of gravity in the Warrior I results in less activation of the hip adductors. This position also offers greater potential for strength gains in the muscles on the back of your leg. To activate the hamstrings, pull your front knee isometrically towards your torso.
CHAIR POSE ( UTKATASANA)
This pose strengthens the muscles at the back of your thigh, the front of your thigh and the buttocks. The wall supports the hips, knees and feet and helps to balance the heels.
For this exercise you need to stand at least half a metre away from a wall. Then lean forward and rub against the wall. Place your hands on your hips and push your hips along the wall. Move your feet forward so that your knees are at an acceptable but not impossible angle. Start with a few inches and work your way up to 90 degrees as you feel stronger.
To increase the intensity, raise your arms above your head and hold for a few seconds. Then take a few deep breaths and stand up straight again. Prop yourself up on a chair and lean against the wall. To give your calves a better workout, lift both heels and keep your knees bent.
Take a deep breath and lift your heels off the floor. Then inhale a few more times to lift them. Stand with your heels upright and move your back towards the wall. This will take the pressure off your legs.
LATERAL PLANK ON FOREARM (VASISTHASANA)
Weak hip abductors are a common sign of hip and knee osteoarthritis. When you walk, this can cause you to shift your weight onto the affected hip. This tilts the pelvis down and increases the pressure on your inner knee joint. The lateral plank is a good way to strengthen your gluteus medius muscle. This is the main hip abductor.
Start by bending your forearm into a plank. Then rotate your right forearm so that it is facing your left hand. Your forearm should be at a 45-degree angle to the front edge of the mat. Then place your left foot on the mat and roll onto the outer edge of your right foot.
Tense your core and right inner hip by pressing your hips towards the mat. As you raise your shoulders, lift your left leg and press your right forearm onto the mat. Look forward or towards your left hand. Hold the pose for 3 to 5 breath cycles. Then switch sides. Lower your knees to the mat for extra support if this posture proves too difficult.
KNEE TO CHEST (APANASANA)
This gentle stretch is for your lower back. It also helps to mobilise your hips. Place your hands on your stomach and pull your knees towards your chest.
Once you have placed your hands on each knee, place your hands on the other side. Then press your knees together with your hands.
HAMSTRING STRETCH ( SUPTA PADANGUSTHASANA)
This pose improves flexibility of the hips, hamstrings and calves, hip abductors, hip adductors, hip abductors, ankles, knees and hips. If you have lower back pain, you can bend one leg. Your foot should be flat on the floor.
Lie on your back with your legs stretched out and bend your right knee towards your chest. Put the strap around your right foot. Then hold the strap in each hand. Extend your right heel towards the ceiling by lifting your right leg towards the sky. After bending your right leg, take a few deep breaths and then straighten it again.
The belt should be wrapped around your right leg. As you move the belt in one direction, gently pull it closer to your body. After a few seconds you can reverse direction and circle the strap a few more times. Switch to your left foot.
BRIDGE POSE ( SETU SARVANGASANA)
Bridge pose not only strengthens the back and gluteal muscles but also stretches the front muscles. Bridge pose can also improve your posture by strengthening the muscles that support the spine. Unlike other poses where the entire body is supported by the knees and hips, the bridge pose supports some weight.
First lie on your back and bend your knees. Then place your feet on the floor. Your heels should be slightly in front of your knees. Next, bend your elbows so that your chest is parallel to your elbows.
Your forearms should point towards the ceiling and your fingers should point towards the ceiling. With the next inhalation, press your feet, your arms and your back down towards the ceiling with your fingers. This will lift your hips and increase your heart rate. Then exhale and return to the floor. You can repeat the bridge again.
RUNNER’S STRETCH
This is a stretch for the soleus and gastrocnemius calf muscles. You can direct the stretch to your soleus muscle by bending your back knee.
Stand with your back against the wall, about a foot away from it, and remain standing. Your hands should be at chest level. Put your left foot two to three feet back so that both feet are facing the wall.
Keep your spine straight and lean forward from the hips. Bend your elbows. Your left calf muscles should feel stretched. If you do not feel a stretch in your left calf muscles, move your left foot further back. Hold this position for several minutes.
Now bend your left knee and keep it in line with the centre of your left foot. Now shift your weight onto the ball of your left foot and extend your left heel through. Take a few deep breaths and hold this position for a while.
CLOSED ANGLE POSE ( SUPTA BADDHA KONASANA)
This pose helps to relieve pressure on your lower back and mobilise your hips in preparation for seated meditation. Keep your elbows together as you lower your knees.
Instructions: Lie on your back and stretch your arms out. Place your feet flat on the floor, about shoulder-width apart, and bend your knees. Inhale and then exhale. Roll your knees to the left, rolling to your right foot and your left foot. Keep your knees together as you lower.
Inhale deeply and raise your knees to the centre. Inhale and then lower your knees to the left. Repeat these movements a few more times.
Begin by keeping your feet together. Then inhale and open your knees towards each other. Your knees should be brought together. Then exhale and place the soles of your feet on the mat. Continue this movement a few more times and then take a few deep breaths while keeping your knees open and the soles of your feet on the mat.
ARTHRITIS OF THE KNEE EXERCISES
Liebscher und Bracht has published an effective video series on osteoarthritis. Arthrosis in the knee cannot be cured? We think differently! If you regularly fight the cause of your arthrosis – muscular-fascial tension – with the help of these exercises, you can get rid of your pain and in the long run even create new cartilage.